
Everything so far has been theory. Wireshark lets you see it: every packet, every header, every handshake. It comes installed on Kali.
Only capture traffic on networks you own or have permission to monitor. Capturing other people's traffic can be illegal.
Step 1: Start a capture
Open Wireshark, then double-click the interface connected to your lab (the host-only adapter, often eth0 or eth1). Packets start scrolling immediately.
Step 2: Make some traffic
In a terminal, request the Metasploitable web page:
curl http://192.168.56.102/Step 3: Filter the noise
Type a filter in the bar at the top and press Enter:
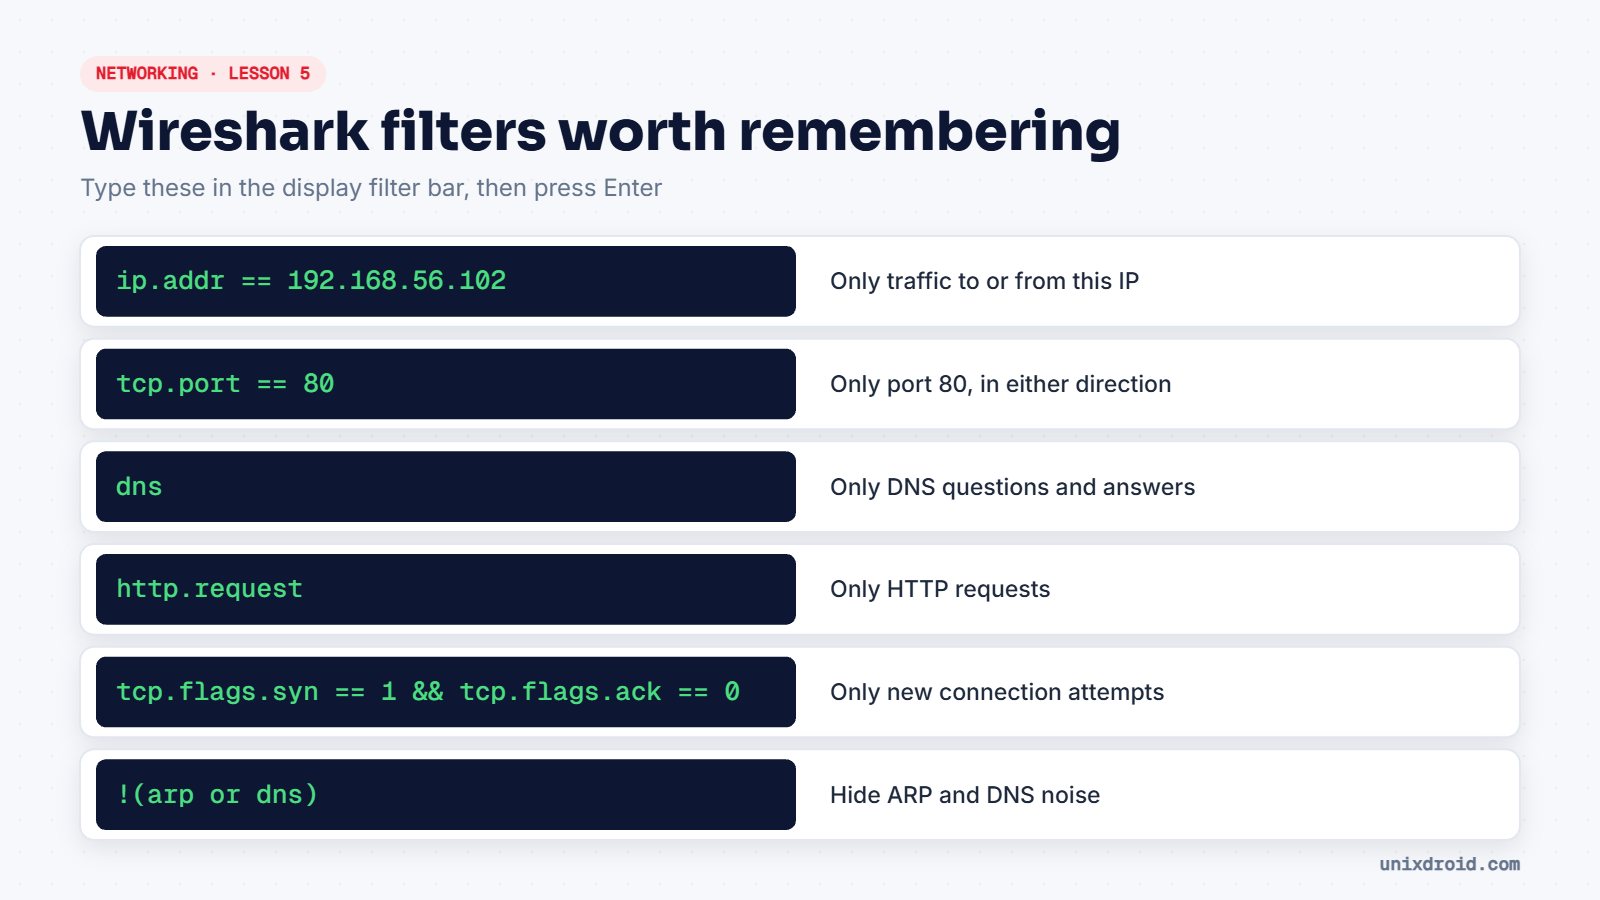
Try http.request first. You'll see your GET / request. Click it and expand the layers in the middle pane. You'll find Ethernet (MAC addresses), IP, TCP (ports) and HTTP, the same layers from the OSI lesson.
Step 4: See why plain text is dangerous
Now connect to the old Telnet service on Metasploitable:
telnet 192.168.56.102Log in with msfadmin / msfadmin, then type exit.
Back in Wireshark, filter with telnet, right-click any packet and choose Follow → TCP Stream. You'll see the whole session, including the password, in readable text. Anyone on that network could have seen it too. That's exactly why Telnet was replaced by SSH.
Capture filters vs display filters
| Capture filter | Display filter | |
|---|---|---|
| When | Before capturing | After capturing |
| Effect | Packets not matching are never saved | Just hides packets from view |
| Example | host 192.168.56.102 | ip.addr == 192.168.56.102 |
Beginners should mostly use display filters, so nothing gets lost.
Save your work
Use File → Save As to keep the capture as a .pcapng file. You can open it again any time, or share it with a teammate.